How to Update XAMPP to the Latest Version
27 May 2015
XAMPP is one of the best development environment that let you build web applications locally. XAMPP let you work on PHP, MySQL and Perl with easy to use control panel. Installing the XAMPP tool for the first time is quite easy but updating the XAMPP is a tedious job as it doesn’t come with an auto update feature. Here is how to update XAMPP to the latest version.
Before you begin make a complete backup of XAMPP folder for safety and follow the steps below to upgrade the XAMPP.
Also read:
- How to Automatically Add Your Inspect Element CSS Updates to Stylesheet
- Best WordPress Plugins to Detect Adblock Extension and Avoid it
Steps to Update XAMPP
- Copy your websites (folders) from htdocs folder and paste them to a safe place
- Navigate your browser to localhost > phpMyAdmin and go to “Export” tab
- Choose on “Custom – display all possible options” under “Export Method”

- Select your databases one by one by holding control key
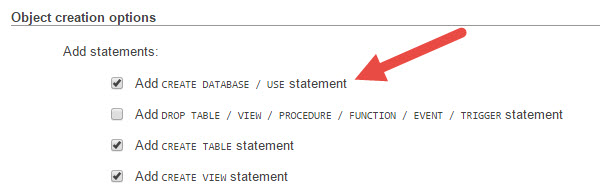
- Select “Add CREATE DATABASE / USE statement” check box in “Object creation options” and click on the “Go” button
- Now uninstall the current XAMPP version, also delete XAMPP folder if exist
- Download and install the latest version of XAMPP
- Move your websites (folders) back to htdocs and navigate to localhost from your browser and go to “Import” tab
- Click on “Choose File” and select the exported file then click on “Go” button
That’s all, now open the new XAMPP control panel and start working on the updated environment.